The Ultimate Grow Guide for Gorilla Glue Marijuana
Welcome to the ultimate grow guide for Gorilla Glue marijuana! Whether you’re a novice or experienced grower, this comprehensive guide will provide you with everything you need to know to cultivate healthy, potent Gorilla Glue plants.
From setting up your grow tent indoors to optimizing bud growth and harvesting, we’ve got you covered.
Growing Gorilla Glue Marijuana Indoors and Outdoors
Growing Gorilla Glue marijuana can be done both indoors and outdoors, each with its own advantages and challenges.
Indoors: Setting Up Your Grow Tent
Indoor cultivation presents growers with the opportunity to exercise precise control over environmental variables such as temperature, humidity, and lighting. This controlled environment proves advantageous for both novice cultivators and seasoned growers.

To embark on indoor cultivation, the first step involves establishing a dedicated space equipped with a grow tent. Select a location that provides ample room for your plants to flourish. It’s imperative to ensure proper ventilation within the grow tent to maintain optimal airflow and prevent the buildup of humidity.
Additionally, investing in high-quality LED grow lights is essential for promoting vigorous growth and maximizing yields.
These lights mimic the full spectrum of sunlight, providing plants with the energy they need for photosynthesis and overall development.
Outdoors: Embracing Natural Sunlight
Outdoor cultivation offers Gorilla Glue plants the opportunity to bask in natural sunlight, fostering robust growth and potentially higher yields. Unlike indoor cultivation, outdoor growing relies on the sun’s natural cycle to fuel plant growth.
When opting for outdoor cultivation, selecting an appropriate location is paramount. Choose a sunny spot with well-draining soil to ensure optimal growing conditions. Incorporating organic fertilizers into the soil can further enhance its health and fertility, promoting the growth of healthy, vibrant plants.
However, it’s crucial to remain vigilant against potential threats such as pests and adverse weather conditions, which can impact plant health and yield.
By embracing natural sunlight and optimizing growing conditions, outdoor cultivation can yield rewarding results for Gorilla Glue growers.
Growing Gorilla Glue Seeds: A Thorough Guide
Whether you’re embarking on your journey with Gorilla Glue from seeds or clones, giving proper care and attention is paramount for a successful cultivation experience. Below is a comprehensive step-by-step guide to growing Gorilla Glue seeds:
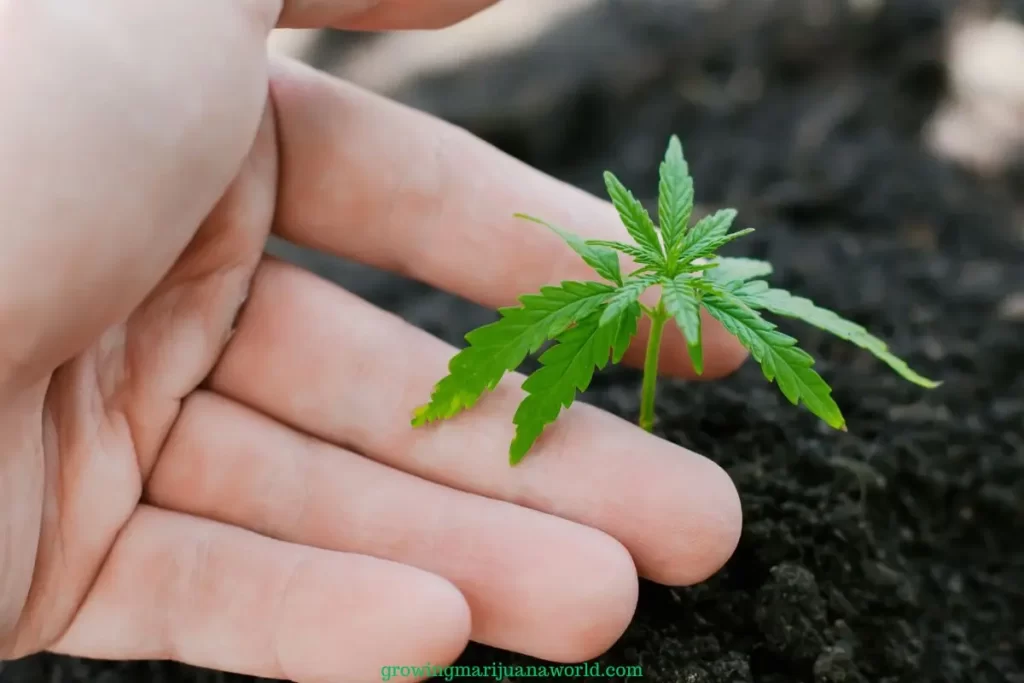
- Germination: Kickstart the growth process by germinating your Gorilla Glue seeds. You can choose to germinate them by placing them in a damp paper towel or directly into seedling trays filled with moist soil. Ensure a warm and humid environment to encourage speedy germination.
- Seedling Stage: Once your Gorilla Glue seeds have sprouted, it’s time to transfer them to small pots filled with well-draining soil. Be gentle with watering during this stage to avoid overwatering, which can lead to damping off or root rot. Provide adequate light, preferably in the form of full-spectrum LED grow lights, to promote healthy seedling growth.
- Vegetative Growth: During the vegetative stage, focus on providing your Gorilla Glue plants with everything they need to thrive. This includes ample light, nutrients, and water. Consider supplementing with a balanced fertilizer to support robust vegetative growth. Additionally, you may opt for techniques like topping or pruning to encourage bushier plants with multiple budding sites.
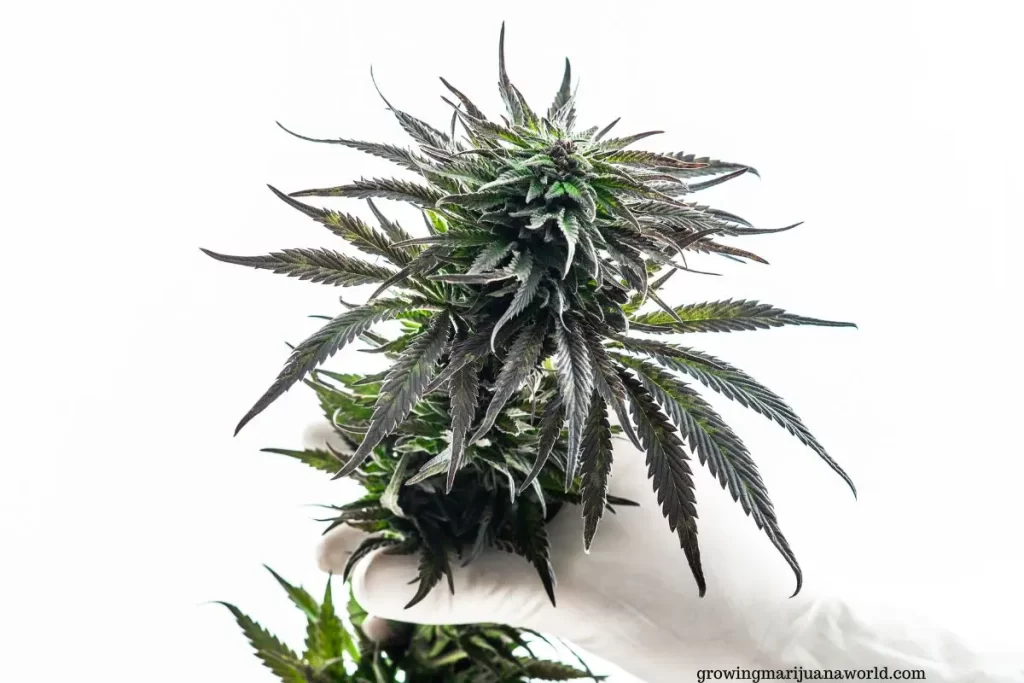
- Flowering Phase: As your Gorilla Glue plants transition into the flowering stage, it’s crucial to adjust your lighting schedule accordingly. Mimic natural sunlight patterns by gradually reducing the light cycle to 12 hours of light and 12 hours of darkness. Monitor humidity levels closely, as high humidity during this stage can increase the risk of mold or bud rot. Provide support for heavy buds to prevent branches from snapping under their weight.
- Harvesting and Curing: The culmination of your cultivation journey arrives when your Gorilla Glue buds reach maturity. Harvest them when the trichomes have turned cloudy or amber in color, indicating peak potency. Use sharp scissors or shears to carefully trim the buds from the plants. After harvesting, follow proper curing techniques to preserve the flavor, aroma, and potency of your buds. Hang the trimmed bud’s upside down in a cool, dark room with good airflow for 7-10 days before transferring them to airtight jars for further curing.
By following these steps and providing your Gorilla Glue seeds with the care and attention they deserve, you can cultivate healthy, potent plants that yield bountiful harvests of premium-quality buds.
Maximizing Bud Growth with Fertilizers
| Type of Fertilizer | Purpose |
| Balanced N-P-K Fertilizer | A balanced fertilizer containing nitrogen (N), phosphorus (P), and potassium (K) is essential for promoting overall plant health and maximizing bud growth. Nitrogen supports lush, green foliage and vigorous vegetative growth, while phosphorus encourages strong root development and flower formation. Potassium aids in nutrient absorption and enhances the plant’s ability to withstand stressors such as pests and diseases. By providing the right balance of these essential nutrients, balanced N-P-K fertilizers ensure that Gorilla Glue plants receive the nutrients they need at every stage of growth, from seedling to harvest. |
| Organic Fertilizers | Organic fertilizers, derived from natural sources such as compost, bone meal, and kelp, offer numerous benefits for Gorilla Glue cultivation. These fertilizers enrich the soil with organic matter, microorganisms, and beneficial nutrients, fostering a healthy and vibrant growing environment. Unlike synthetic fertilizers, organic fertilizers release nutrients slowly over time, reducing the risk of nutrient leaching and soil depletion. Additionally, organic fertilizers contribute to the development of complex soil ecosystems, promoting soil fertility and sustainability in the long term. By incorporating organic fertilizers into your cultivation regimen, you can enhance the terpene profiles of your Gorilla Glue buds, resulting in flavorful and aromatic cannabis harvests. |
Curing Your Gorilla Glue Harvest
Curing your Gorilla Glue harvest is a crucial post-harvest step that can significantly impact the flavor, potency, and overall quality of your buds. Follow these step-by-step instructions to ensure a successful curing process:
- Harvest and Trim: Once your Gorilla Glue plants have reached the desired maturity level, carefully harvest the buds using sharp scissors or shears. Trim away any excess leaves and stems to improve airflow and concentrate the plant’s energy on bud development.
- Hang the Buds: After trimming, suspend the buds upside down in a cool, dark room with adequate airflow. Use drying racks or strings to hang the buds evenly spaced apart, ensuring they do not touch each other. This position allows for uniform drying and prevents mold or mildew growth.
- Controlled Drying: Allow the buds to dry slowly for 7-10 days. Monitor the drying process closely, ensuring that the room maintains a temperature of around 60-70°F and relative humidity between 45-55%. Avoid drying the buds too quickly, as this can lead to harsh or unevenly cured cannabis.
- Check for Dryness: To determine if the buds are sufficiently dry, gently pinch a small bud between your fingers. It should feel dry on the outside but still slightly moist on the inside. The stems should snap rather than bend when bent.
- Transfer to Jars: Once the buds have reached the desired level of dryness, transfer them to clean, airtight glass jars. Fill the jars about three-quarters full, leaving some space for air circulation.
- Burp the Jars: Burping the jars is essential for releasing excess moisture and preventing mold growth during the curing process. Open the jars once or twice a day for the first week, allowing fresh air to enter and stale air to escape. Gradually reduce the frequency of burping as the buds continue to cure, typically over the course of 2-4 weeks.
- Monitor Humidity Levels: Throughout the curing process, keep a close eye on the humidity levels inside the jars. Use a hygrometer to ensure that the relative humidity stays between 55-65%. If the humidity levels are too high, remove the buds from the jars and let them air out briefly before sealing them again.
- Patience and Testing: Curing is a gradual process that requires patience and attention to detail. Allow the buds to cure for a minimum of 2-4 weeks, although longer curing periods of 6-8 weeks or more can further enhance flavor and potency. Periodically sample the cured buds to assess their aroma, flavor, and smoothness, adjusting the curing process as needed to achieve the desired results.
By following these steps and maintaining optimal conditions throughout the curing process, you can unlock the full potential of your Gorilla Glue harvest, resulting in beautifully cured buds that deliver an exceptional smoking experience.
FAQs (Frequently Asked Questions)
- How long does it take to grow Gorilla Glue marijuana? Gorilla Glue typically takes 8-9 weeks to flower indoors, while outdoor cultivation may extend the flowering period by a few weeks.
- What is the ideal temperature for growing Gorilla Glue indoors? Maintain temperatures between 70-85°F during the day and slightly cooler at night for optimal growth and resin production.
- Can I use homemade compost as fertilizer for Gorilla Glue plants? Yes, homemade compost can be an excellent source of organic nutrients for Gorilla Glue marijuana, but ensure it’s fully decomposed to avoid nutrient imbalances.
- How often should I water my Gorilla Glue plants during the flowering stage? Water Gorilla Glue plants when the top inch of soil feels dry, typically every 2-3 days, but adjust frequency based on environmental conditions and plant size.
- Are there any common pests or diseases that affect Gorilla Glue plants? Gorilla Glue plants are susceptible to pests like spider mites and aphids, as well as fungal diseases like powdery mildew. Implement preventive measures and monitor plant health regularly.
- Can I grow Gorilla Glue marijuana hydroponically? Yes, Gorilla Glue can thrive in hydroponic systems, but ensure proper nutrient balance and pH levels for healthy root development and vigorous growth.
Conclusion
As we wrap up, it’s evident that cultivating Gorilla Glue marijuana is more than just a hobby; it’s a deeply rewarding experience that beckons patience, meticulous attention to detail, and an undying passion for nurturing premium-quality cannabis.
Whether you opt for the controlled environment of indoor cultivation or embrace the natural elements of outdoor growing, the key lies in providing optimal conditions for your plants from seed to harvest.
By following the insightful tips and guidelines outlined in this guide, you’re well-equipped to embark on your journey to growing your own Gorilla Glue buds.
Remember to prioritize factors such as proper lighting, nutrient balance, and environmental control, as they play crucial roles in determining the success of your cultivation efforts.

As you nurture your Gorilla Glue plants through each stage of growth, savor the journey and revel in the anticipation of the harvest to come. Soon enough, you’ll be rewarded with the fruits of your labor—lush, aromatic buds bursting with potency and flavor, cultivated with your own hands.
So, whether you’re a novice grower or a seasoned enthusiast, take pride in your cultivation journey and celebrate the joys of homegrown cannabis.
With dedication and perseverance, you’ll soon find yourself enjoying the rich rewards of your own homegrown Gorilla Glue buds!